Monday, September 12, 2011

{Random} Tip Tuesday

I love the Tip Junkie's link-up party on Tuesdays, and while I don't have any tutorials or terribly cool projects to share, I thought I'd show a few new additions to my home {and routine} I find pretty creative...and quite helpful!

First up - ANOTHER USE FOR A WOODEN DOWEL

Purchased at Michael's for under $1, it now keeps little hands out of the row of drawers in the kitchen.
The bottom 2 drawers house all my plastic baggies, plastic wrap, aluminum foil, etc.  They were sooooo tempting, and soooooo much fun to pull out and leave all over the kitchen floor.  Drove me crazy!  But, I didn't want to spend $$ on the child drawer locks, and wasn't quite sure how I'd keep all 4 drawers closed {and for those who think I can't count, what appears to be drawer #2 and #3 - from the top - are really 1 deep drawer}.  For under $1...DONE!  And, if we weren't in a rental house and I had a painted/color-coordinated kitchen, it could easily be spray painted.  I've thought about painting it red.  We'll see.


Okay, Tip #2: Easy sippy cup clean-up

Why I didn't think of this earlier??!  We have the nifty little baskets that hold the nipples for bottles or sippies, and in theory, they're great.  But also, it's a pain to sort through everything to find the nipple that goes with the correct cup, since we all know they're never interchangeable.  Alas, an easier way!
 Unscrew the lid, pop the nipple out of it, and stick the nipple INSIDE of the cup/bottle!!
It goes in and comes out easily, yet won't fall out on its own.  Turn the cup upside down, place on the top rack in the dishwasher, and the next morning {at least at my house}...VOILA!  A clean, sanitized sippy and there's no searching for the correct nipple.

Sometimes the simplest things make me the happiest.

Okay, and last but not least, a yet-to-be-tried, but-in-theory-it's-AWESOME!  I'll let you know how it goes tomorrow.

So....our 3 year old sleeps pretty well, plays in his room before he goes to sleep as well as (most mornings!) when he wakes up.  Once he moved from the crib to the big boy bed, we had a little issue with him coming out of his room.  So, we {humanely} started locking him in. {we have a doorknob cover on the inside of his door so he can't open it.}  It's worked great.  He could care less it's there, plays in the mornings, and then lays down on the floor, looks under the crack, and sings, "Mom-my. Come get me." when he's done.  Again, he doesn't care.  Husband, however, apparently does.  He's mentioned several times recently that we need to take it off...yet he's long gone for work when G comes sauntering out of the room at 6:15.  A little too early for this Mommy.

Anyway, he's 3 1/2.  Obviously he can't tell time yet, so saying he can't come out until ___ time won't work.  In some magazine (???) I remember seeing these cute little nightlights that you could set the time, and when they turned off the in the morning, that was the child's sign it was okay to get up.  Cute, but $$. 

And I'm cheap. 

So, that got me thinking.  And gathering supplies we already had, so this project has cost me nada...especially important in case it's an epic fail tonight.
Electrical tape, a nightlight, and an outlet timer. {if your nightlight doesn't have a light sensor, you can omit the electrical tape}
Cover the light sensor with the electrical tape {so, in theory, it would stay on all the time}.

Next, set your timer to the current time, and then choose the times you want it to turn on and off.  For this model, you push down the "buttons" when you want it on, and leave the rest of the "buttons" up.  I have it turning on around 8:30pm (bedtime, give or take) and turning off at 7:30am.

Then, plug it in:  

And then plug in the nightlight:
Probably not as cute as the model I saw in the magazine (really wish I could remember where I saw it...) but hopefully it will work just as well.  For a WHOLE lot less money.  Even if I had purchased all items necessary, it would probably be under $7...but already having them on hand makes the FREE even better!!

Update:Well, while last night started off great - he was asleep in about 10 minutes.  Nearly unheard of on days he takes a nap.  And he seemed excited that there "weren't any more shadows"...hmmm.  Don't know what that was about...he'd never mentioned shadows before.  Anyway, so he slept all night like a champ...until I heard his door open this morning.  At 6:06.  AM.  Apparently we didn't get the whole "it's not time to get up until the light is off" thing.  Sigh.  So, we'll try again tonight.  With the door knob child proofing back in place.  =)


I'm linking to:

Tip Junkie handmade projects

Tuesday, September 6, 2011

Creative AMnesia?

JuliaStitches openly admitted she's recently lost her "crafting mojo".  Apparently I have, too.  Maybe it's a reduction in caffeine?  Or just a crazy 14 month old keeping me on my toes every waking moment?  Despite the lack of posting, there have been a few projects ongoing in my house. 

I've already shown you Blueblanket:
who is still very loved (and in one piece!).  Yay!

 Because I obviously have a complex and don't want son #2 to feel inferior because he doesn't have a Mommy-made blanket (I'll blame it on my MiddleChild syndrome...).  ANYWAY...I decided to pretend I actually knew what I was doing and spent a ridiculous amount of time coming up with my own pattern.  I liked the lines and squares from "blueblanket", but wanted it to be a bit different.  It obviously doesn't have a name yet...you know, since H doesn't really speak much at 14 mos...but I was very pleased with how it turned out:


My only predicament now is that it matches G's bedroom better than H's.  Aghhhh!!!  What to do??!!!

******************************************************************************


Let's see....all 3 big boys (my oldest and JuliaStitches' 2) have their own personalized superhero capes:


AND, since we're a terribly cool team, she thought up and I produced.....


MATCHING SUPERHERO BELTS!!
(Unfortunately for photographic purposes, said superhero belts combined with capes make you entirely too fast and unable to stand still for a photo-op.)
{capes and belts can be purchased at: http://www.thecaffeinatedmommy.etsy.com/}
=)


Um...let's see.  I've also made a few more bibs for my etsy site...including some football ones:


I love pictures of happy {and absolutely adorable!!!} customers!!


I'm in the process of coming up with a "Boo-Hoo" boo-boo owl (he has rice in the bottom and once refrigerated, can be used as a cool pack).  He'll be super cute...I'll post pictures when I'm done with him.

And, for the same customer/friend, I've also just completed a bouncy scarf...another item she found on pinterest and asked if I could replicate.  It called for elastic thread - which, honestly I didn't even know existed!!  She doesn't have it yet, but here's to hoping she'll like it.  I think it turned out cute!


So, this post makes it appear that maybe I don't have Creative Amnesia.  Maybe it's just blogging amnesia.  =)


Thursday, August 25, 2011

Blue

My eldest son received an adorable, blue crocheted blanket as a gift before he was even born.

For approximately 2 1/2 years, he and this blanket co-existed peacefully in his room, never really taking notice of one another.  Until one day, a love was born.

While he never took any of his "lovies" out of his room (well, rarely), he always had them present while sleeping, and sometime around his 3rd birthday, this included being covered with "Blueblanket".  There was always the bedtime routine...books, prayers, cuddles, etc.  And then comes time for Mommy to leave the room. 

We pull the sheet up.  Then the comforter.  And then, Blueblanket tops it all out.  Usually he'd be out from under everything within a few minutes, but it always had to be done. 

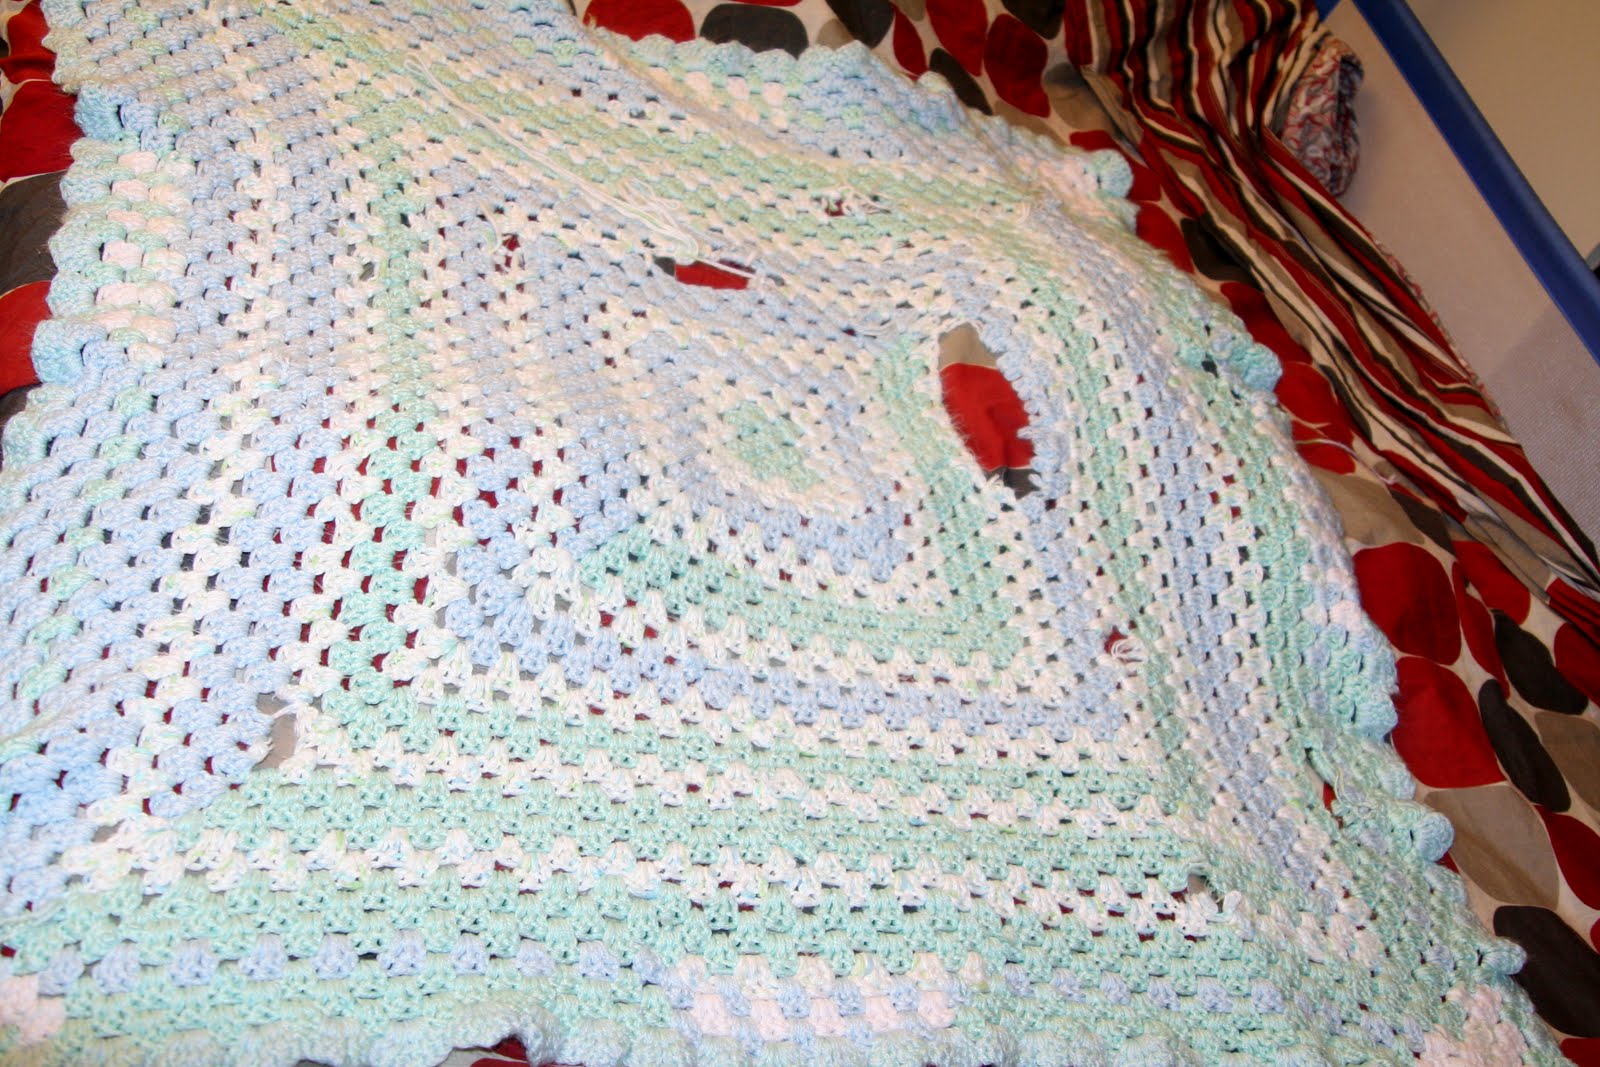
All that to say, Blueblanket went everywhere with us and was washed, on average, probably 2-3 times a week.  And (rather quickly) started to show its age.

At first, there were a few small holes strewn about the blanket.


Most of the time, I could gather the strings and tie a rough knot  to keep it from continuing to unravel.


Every time dear Blueblanket came out of the dryer, he looked a little more rough.

Until one day, I knew something had to be done.

Poor thing was downright pitiful!
I had learned to crochet back in high school, and somewhere in the great abyss of my childhood bedroom closet, there remains an unfinished (and, if memory serves me correctly quite...um...colorful) afghan.  Life happened, I went off to college (where I'm sure it was completely un-cool to crochet) and I forgot how. 

BUT, with help from my cohort, Mrs. JuliaStitches, this old(ish) dog relearned a trick, and picked up the crochet hook once again.  3 weeks later, many "re-dos" and unraveling of squares, and Blueblanket was replaced, with...
well, its name is Blueblanket as well.  But its a new and improved version! 

And I'm pretty damn impressed with myself!!!


I used a different stitch for each color, and I quickly learned what "Check Your Gauge" means.  Just ask JuliaStitches.  There were moments it wasn't pretty.  Like, 3" difference in square size not pretty.  But I love how it turned out.  I love lines.  And squares.

Alas, it may not be perfect, but a certain someone loves his new Blueblanket:

And, yes, these pictures are completely posed, but he really does go to sleep like this every night.  Just without the Smurf in his hand.  That could be painful in the middle of the night.


Tuesday, August 16, 2011

GeekCrafts!

Thanks to GeekCrafts.com finding my PSP cozy worthy of being featured on their website, I know that there are a lot of new visitors to our blog. Hooray! I just wanted to add a quick note to let you know that Creative Momnesia is still a relatively new site, so not all of our pages are complete. Please visit us again in the future, and we'll be sure to have more tips, tutorials, ridiculous stories and more to share with you! Until then, a great, big thanks to GeekCrafts for being so geeky cool. You're awesome.


- Posted from my iPad

Saturday, July 30, 2011

Still Here!

I've noticed that while the Caffeinated Mommy had added all these wonderful tutorials and made several posts in the past few weeks, I've um...made none. Oh whoops... But as the Caffeinated Mommy and I have joked about on many occasions, knitting takes a lot longer than sewing. ;-) While she can crank something out in a couple of hours while her boys are napping, I'm amazed if I can finish I project in two or three days.

Lately, I've been feeling a bit under the weather, and DH has been super busy with work, traveling for more than half of the month, so I've been knitting, but I haven't had the extra time to write anything about it.

I finished a couple of projects for the Glee Cast Knitting Project that a wonderful group of Gleek knitters and crocheters put together. We made hand knit items for every member of the cast, and we're hoping that these lovingly made items will be worn by the actors on the show. It'd be pretty cool to see something I made on TV.

So here were my contributions:


Two hats for Finn (Cory Monteith). It was rather difficult to find a pattern for a character whose wardrobe is pretty much confined to jeans, striped polos or a football uniform.

Then, at the last minute, I made this cowl for Mercedes (Amber Riley). I love how it turned out, and I'll definitely be making another one for myself. :-)
For more information on the yarns and patterns I used for these items, visit my other blog: Somewhere Between the Stitches.

I also finished some other projects recently, and I don't think I've shared them here...

A dinosaur hat, made for a friend's little one who recently turned one:
The Stereostyle hat, which I also made for the same little man as the Dino Hat, but this is an improvised pattern, so I'm working on writing up both a knit and crochet pattern for the headphones. Will share them soon!
The hat itself is knit, but the headphones are crocheted on this version. I've made up another one with knit headphones, but I haven't got a photo of that one just yet.

I'm also still plugging along on the Ratchet and Clank hats, although from time to time, I need a break from those hats. Since I'm writing a pattern for those as I go along, it requires a bit too much thinking for my knitting tastes and there's only so much of it I can take at a time. ;-) So far, Clank is complete, and version 2 of Ratchet is in the works. Hopefully, I'll be able to share those patterns soon!

Thursday, July 28, 2011

Bandana Dress

There will be no tutorial for this quick entry, but I just had to share my newest creation:
A "PILLOWCASE" DRESS MADE FROM BANDANAS!!

 I'm totally not a dress kinda gal (my 3 1/2 year old calls any woman wearing a dress a "princess" because he sees dresses so rarely!  ha!)
But seriously.  How freaking cute is this??!!!  And of course I have no female little people in my life to model it for me, so the deck chair will have to do. 
:)


Tuesday, July 19, 2011

When you make tall,skinny babies....

...there is often some 'ghetto booty' going on in your house.
G - circa Oct. 2009 (18 months)
{sorry for the crappy cell phone photo}

H - 13 months...circa EVERY day

(Not only do my children both have issues with droopy britches, they apparently like to run away from me with said droopy britches!!)
And, since the MIL is in town and sleeping in my sewing room, there is little crafting going on in my home right now.  However, I always enjoy a 'quick fix', and, although it's probably a stretch to say this is a "craft", it does involve fabric and snaps.  And a hammer.  I'm going to say that qualifies it.  ;)

As stated in the title, I (somehow!!!) make tall, skinny babies.  Well, the tall part isn't unbelievable...I'm 5'10" and the hubs is 6'2".  The skinny part?  Yeah.  I don't get that one either. 

Anyhoo...it never fails that the boys need clothes to fit the length, and while I am able to find most pants with the adjustable waist band (some brilliant woman made millions on this idea!!), pjs are another story.  I love the cotton, t-shirt material, 2-piece deals for my guys, especially in the summer.  And who can pass up $3 pjs (when they're on sale) at Walmart??!

Enter the hammer. 
And snaps.
And for those of us who are too cheap to buy one of the nifty snap affixing tool thingies (technical term), you can use a wooden block, or an 864 year old wooden spool handed down by your mother.
With the pants on the child, I pull the fabric together in the back until they're snug enough to stay up.  I usually use a safety pin (or just keep them pinched between my fingers, pick up the child with the other hand, and remove the pants altogether) to judge how much fabric needs to be taken in.  (Sorry, no picture for this step.  I'm not quite talented enough to hold a 20 pound wriggly child, the pants, AND the camera.  Sorry.  I'll work on my awesomeness skills.)


Using the rear seam as a guide, I keep that as my center, and adjust my pinning/holding/marking accordingly.


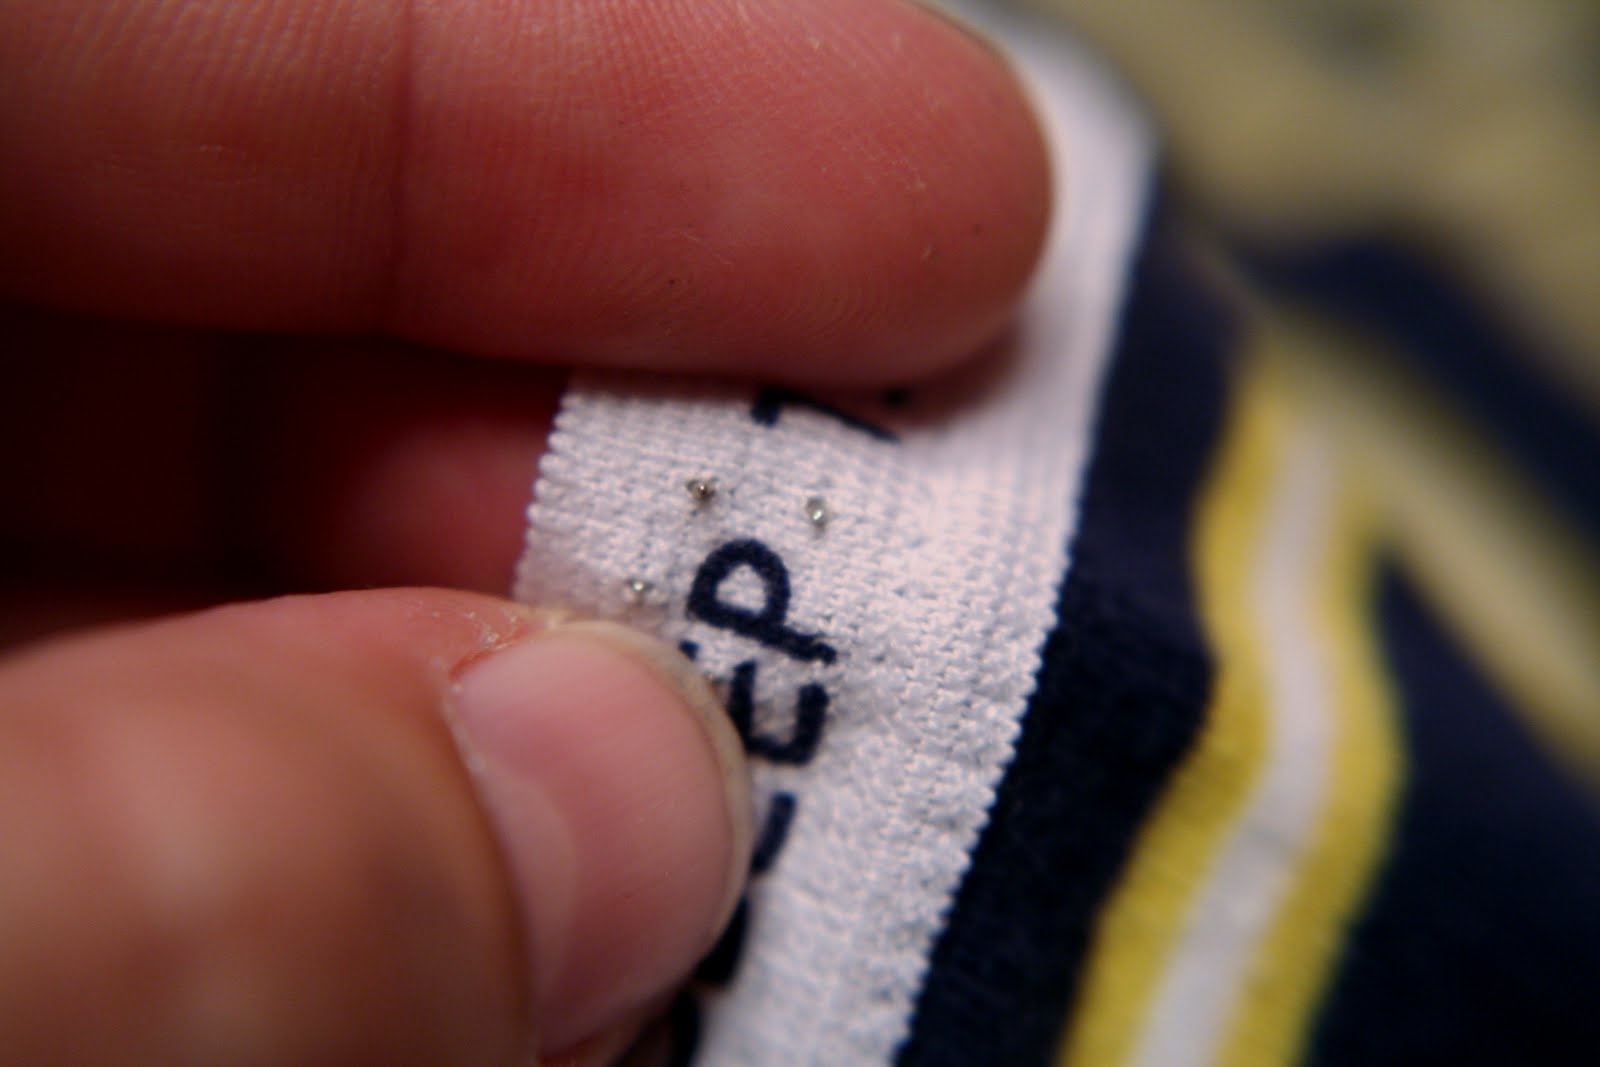
Attach the snaps on either side of your center seam with the "top" of the snap on the inside of the waistband.  By doing this, the 'male' end of the snap will be pointing away from baby when unsnapped and you'll never have to worry about it coming unsnapped (or leaving it unsnapped) while baby is sleeping or when baby fills out enough not to need the snap.


Then just fold the back of the pants together (extra fabric will be against baby's back)...
...and SNAP!


Insert baby, and you're done!

The best part of this quick fix, is that if you attach the snap in the waistband, once baby grows you can either just leave it unsnapped or remove the snap altogether, and there will be very little evidence of it ever having been there.


I'm linking to:
Tip Junkie handmade projects